Friday, May 20, 2011

Canning Presentation by Janet Knight

Post by Janet Knight, Picture from Fresh52

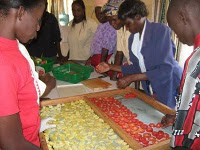
Canning Education Program at Fresh52 Farmer & Artisan Markets. I (Janet) will be doing presentations and each month one actual demo at the Markets.

Saturday at Tivoli
302 S. Rampart
Las Vegas, NV 89145
8:00 am to 1:00 pm

9480 S. Eastern
Las Vegas, NV 89123
8:30 am to 1:00 pm


Stop by to add you name to our monthly drawing & good Ball coupons & a free box of Pectin!

Note by Lisa:
Don't forget that Janet's applesauce won a blue ribbon at the County Fair!!

Trivial Pursuit


I have the original "Trivial Pursuit" game, and today I was asked this question...

"Whose army were canned foods developed to feed?"

Thanks to the Master Food Preservers class, I knew that answer!  
My son was shocked that I got it right :)

(click the picture above if you've forgotten the answer)

Tuesday, May 17, 2011

Testing Pressure Gauges - Locations in Nevada

Listed below are the current locations in Nevada that will test dial gauges for presser canners.

Henderson, NV Locations:

Lisa Casey
95/Sunset or 215/Stephanie
lisainnevada(at)gmail(dot)com
email to schedule an appointment

Janet Knight
Sunday's at Sansome Center
9480 S. Eastern
Las Vegas, NV 89123
Time: 8am -1pm

Northwest, NV Locations:

Faith A.
Summerlin at Del Webb and Lake Mead
olefaithfull(at)gmail(dot)com
email to schedule an appointment

Janet Knight
Saturday's at Tivoli (Rampart & Summerlin Parkway)
302 S. Rampart
Las Vegas, NV 89145
Time: 8 am -1 pm

East Clark County/Logandale, NV:

Mike Donahue
mouse(at)mvdsl(dot)com
East Clark County Extension Office
1897 N. Moapa Valley Blvd.
P.O. Box 126
Logandale, NV 89021-0126
(702) 397-2604
Fax: (702) 397-8301
email or call to schedule an appointment

Lincoln County/Caliente, NV:

Holly Gatzke, Extension Educator
gatzkeh(at)unce(dot)unr(dot)edu
360 Lincoln Street
P.O. Box 728
Caliente, NV 89008-0728
(775) 726-3109
Fax: (775) 726-3332
email or call to schedule an appointment


A dial gauge canner has a pressure dial on the top that allows you to read the pressure inside the canner during the canning process. Dial gauges operate from 0- to 25-pounds of pressure, with most recipes and canning instructions calling for a pressure of either 6- or 11-pounds of pressure. Dial gauges MUST be tested every year for accuracy. Your dial gauge will be tested against a Master Gauge which will determine if your gauge is accurate, if you can compensate for your gauge being off, or if your gauge needs to be replaced.

If the gauge-reading is off by one or more pounds, you are encouraged to purchase a new gauge. If it is off less than one pound, remind yourself of the difference and adjust the recipe’s ressure accordingly to allow for the difference. Incorrect readings will lead to unsafe foods that are under-processed or over-processed.

Replacement gauges and other parts (e.g. gaskets, safety plugs) for canners are often found at stores that sell food preservation equipment or from canner manufacturers. When ordering parts, be sure to provide your canner model number and describe the parts you need.

Friday, May 13, 2011

Online Weekly Ads for Star Nursery


Star Nursery is a local gardening store in Las Vegas with great weekly sales.  They now have their ads online!  Click here every Friday to check out the new deals!  

Thursday, May 12, 2011

Canning Meat
by Sheila

Post and Pictures by Sheila

I first cleaned my work area and laid out all the tools I would need during the canning process.

I then washed and trimmed the fat off my meat before cooking it.


I browned the stew meat before placing the meat in the jars. I added beef broth to the stew meat.

I opened a jar of stew meat and added some bbq sauce to have bbq beef sandwiches. The beef melted in my mouth.

I hope you are all enjoying being a Master Food Preserver as I am. If any of you have any questions do not hesitate in contacting me at svansonpfs(at)yahoo(dot)com.

I have also canned 120 jars of fresh meat. chicken, stew meat and hamburger.

Related Fact Sheets from the National Center for Home Food Storage Preservation 

Wednesday, May 11, 2011

Canning Ground Beef
by Sheila

Post and Pictures by Sheila

I first cleaned my work area and laid out all the tools I would need during the canning process.

I  fried the hamburger...


and washed the fat off before placing the meat in the jars.

I added chicken broth to the chicken and beef broth to the stew meat and hamburger.

I hope you are all enjoying being a Master Food Preserver as I am. If any of you have any questions do not hesitate in contacting me at svansonpfs(at)yahoo(dot)com.

I have also canned 120 jars of fresh meat. chicken, stew meat and hamburger.

See you in the KITCHEN!!!!

Related Fact Sheets from the National Center for Home Food Storage Preservation

Tuesday, May 10, 2011

Canning Chicken
by Sheila

Post and Pictures by Sheila

I first cleaned my work area and laid out all the tools I would need during the canning process.

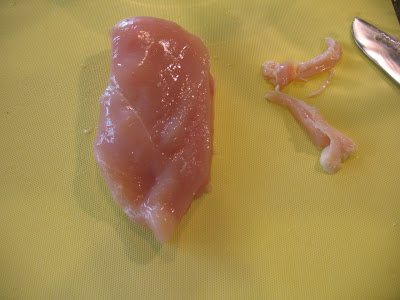
I then washed and trimmed the fat off my chicken before cooking it.


I boiled the chicken before placing it in the jars. I also added chicken broth to the chicken.

I opened a jar of chicken and used it to make orange chicken and served it over fried rice which I added my dehydrated peas, carrots, green and red peppers, onions, garlic and broccoli. It took me 5 minutes to prepare dinner and 25 minutes to cook the rice with the dehydrated veggies. And if I don't say so myself it was delicious...

I hope you are all enjoying being a Master Food Preserver as I am. If any of you have any questions do not hesitate in contacting me at svansonpfs(at)yahoo(dot)com.

I have also canned 120 jars of fresh meat. chicken, stew meat and hamburger.

Related Fact Sheets from the National Center for Home Food Storage Preservation 


Monday, May 9, 2011

Tip for Dehydrating Foods
by Sheila

Post by Sheila

When dehydrating your food it is very important to wear gloves when you touch the food. Even during the preparation of the food to avoid transferring the oil from your hands, lotion or any other things that may be on your hands. You do not want to transfer anything to your food that could spoil it later.

It is even more important to wear gloves after it has been dehydrated because the food is free of moisture and you do not want to transfer any moisture to your dehydrated food that may cause it to spoil later. Also when removing food from your daily storage containers you also want to wear gloves to keep your food free of anything that may cause it spoil.

Sunday, May 8, 2011

Using a Food Saver to Lengthen Shelf Life of Foods


Thinking of Sheila, and her post on dehydrating, I remembered this video I saw by Wendy Dewitt.  She lengthens the life of her shelf stable foods by using the Food Saver.

I bought a used Food Saver on Craigslist and saved over 50%. The Jar Sealers (not sold with the original unit) can be bought at Bass Pro Shops.  I have not found another store in Nevada that sells the Jar Sealers, so if you know of any please list them in the comments.  There are other brands that are compatible with Food Saver's Jar Sealers such as Seal a Meal, just make sure it has an accessory port with tubing.
My Food Saver (Click to Enlarge)

The Food Saver is NOT a substitute for Wet Bath Canning or Pressure Canning.  Using the Jar Sealer, It is meant to increase the shelf life of things such as nuts, uncooked rice, granola, uncooked pasta, dehydrated foods, etc.

To watch Wendy's entire presentation on food storage click here.

Saturday, May 7, 2011

Friday, May 6, 2011

Testing Pressure Gauges - General Information

Testing Pressure Canner Gauges

Pressure canners use either a dial gauge or a weighted gauge. The gauge (dial or weighted) controls and monitors the pressure.

The weighted gauge permits pressure to rise to a definite point and then releases excess steam to keep pressure from going higher. Some people refer to these gauges as “rocking” or “jiggle” gauges. With this type of gauge, the canning process is monitored by listening for a certain number of jiggles per minutes. Check your canner manual for information on how to monitor the pressure. Most weights allow you to process at 5-, 10- or 15- pounds of pressure. Weighted gauges do not require testing but should be kept clean and rust-free.

A dial gauge canner has a pressure dial on the top that allows you to read the pressure inside the canner during the canning process. Dial gauges operate from 0- to 25-pounds of pressure, with most recipes and canning instructions calling for a pressure of either 6- or 11-pounds of pressure. Dial gauges MUST be tested every year for accuracy. Your dial gauge will be tested against a Master Gauge which will determine if your gauge is accurate, if you can compensate for your gauge being off, or if your gauge needs to be replaced.

Check with your County Extension office to see if the testing is done locally. If you cannot get your gauge tested locally, National Presto Industries will test your gauge for no charge!

Carefully remove and package the gauge. Send the gauge to:

National Presto Industries
3925 North Hastings Way
Eau Claire, WI 54703-2200

Questions? Presto Consumer Service Department (1-800-877-0441)

If the gauge-reading is off by one or more pounds, you are encouraged to purchase a new gauge. If it is off less than one pound, remind yourself of the difference and adjust the recipe’s ressure accordingly to allow for the difference. Incorrect readings will lead to unsafe foods that are under-processed or over-processed.

Replacement gauges and other parts (e.g. gaskets, safety plugs) for canners are often found at stores that sell food preservation equipment or from canner manufacturers. When ordering parts, be sure to provide your canner model number and describe the parts you need.

Thursday, May 5, 2011

Testing Pressure Gauges - Policies and Procedures

The Office of the Attorney General at Washington State University Pullman has reviewed potential liability issues connected with Extension testing pressure canner gauges. Many county offices have provided this service to the public for years. Because improper pressure canning can result in severe illness or death, we wanted to insure that our policies around testing were sound.

The Assumption of Risk Form should be used in all county offices that are continuing to test pressure canner
gauges. The policy is as follows:

  • The owner of the pressure canner must be the one who signs the release form.
  • Duplicate copies of the form should be signed and the office should keep a copy for at least six (6) years.
  • Fees should be charged for testing pressure canner gauges. The fee should be sufficient to cover the cost of one or two canning bulletins to assure that home canners have the most recent versions of the bulletins. One of these should be the bulletin “Using and Caring for your Pressure Canner” (unless the client already owns that bulletin).

Your office has the option of no longer testing pressure canner gauges. If you do choose to continue testing, we recommend that your office purchase the version of National Presto Industries testing unit for dial gauges, which uses an air pump and master gauge. The fees for testing pressure canner gauges can be set to include funds for cost recovery of the unit’s purchase. One disadvantage with the new air pump gauge tester is that will only test Presto canners. However, it is more accurate and safer to use than Presto’s older testing unit which uses steam.

Tuesday, May 3, 2011

Testing Pressure Gauges - Equipment


Presto Testing Units are available to Extension Educators for a $75 fee.  Download the PDF above for more information

Monday, May 2, 2011

Complete Guide to Home Canning
and List of Significant Revisions

(link above includes the List of Significant Revisions)

USDA, NIFA, Agriculture Information Bulletin No. 539
December 2009
(compared to 1994 version)

Sunday, May 1, 2011

Master Food Preserve April Class - Day 2 (Certification)

Post and Pictures by Cindy S.
Kiwi Pineapple Jam

Last night after I wrote the post for the blog I remembered that I should have mentioned that this experience being at the Extension has been eye opening as well. This program that I have been so lucky to be involved in are all but extinct and not only in the state of Nevada, but also throughout the country. I hope that all 29 of the graduates in some small way can network to find support for saving this program.

Now onto day two!

I was really waiting for and found today to be a whirlwind of information and canning. Our group at station three got to class around 7:30am as we had to do some prep work for our pickle relish. In doing a pickle relish you have to chop the cucumbers, peppers, and onion, salt them and soak in water for two hours before cooking and preparation.

While we were prepping, our other classmates were busy pulling the dried fruits and vegetables we had dehydrated from the night before. If additional time was needed they went back on the trays and back in the dehydrators. But what was complete was a tasty treat. The Banana's were nothing like the store variety. They were sweet and chewy and not a mushy consistency. The cherry tomatoes, which I think was the class favorite, were little bites that burst of natural sweetness and the flavor was intensely tomato. Many of us were curious about the giant applesauce and red hot fruit leather. It looked great but I think that this won't be my first choice for my dehydrating practice at home. As we all got a taste of our hard work we moved right into the first lesson of the day. Pressure Canning.

Applesauce Leather

I was very excited though I have pressure canned now several times but my goal was to be able to figure out the art of canning meats. We watched a DVD with basic instructions on how to use a pressure canner and then we were sent on our way to the kitchens to prepare our recipes. Carolyn and Jana, our instructors from Utah State, planned out an exciting array of meat, pork and poultry canning that spanned from a raw pack to soups and even meatballs. Yes I said meatballs.

Our group had the round steak and were asked to do both a hot pack and raw pack of this fairly inexpensive meat. The key statement that Carolyn made that changed my mind about meat canning was that an inexpensive cut would do very well since you were going to pressure can it 75 minutes and tenderness of the cut was not going to be an issue. That was all I needed to realize the potential for this type of canning. I wanted to share all the fantastic pictures of how great the canning went after the pressure canner was opened and our meaty goodness was ready for "putting up".

Pressure Canner filling up with meats!

Meatballs & Ground Beef


 Number "3" was our Hot Pack

 Soup


From the pressure canning we moved right into pickling. Again the range of recipes we were given was fantastic. Pickled carrots and jicama, pickled peppers, dill pickles and asparagus, and our two recipes; Sweet Pickle Relish and Dilly Beans.

Dill Pickles & Asparagus


 Pickled Peppers

The pickling recipes were very straightforward but somehow our group had some issues with too much liquid in the relish and not enough liquid for the green beans. We made additional liquid for the green beans and both turned out beautiful.

Sweet Pickle Relish

Dilly Beans


Now remember yesterday how excited I was because our group had the opportunity to can the only blueberry pie filling. Well it turned out amazing. After we were done with the pickles we were asked to make our pie. With a pre-made pie crust, a quart of our homemade blueberry pie filling, and a lot of creativity we had a work of art ready for the oven by lunchtime.

Blueberry Pie - Precooked

Our lunch was quick, but the smell in that room was a baker's dream. Six pies occupied the ovens and the smell of apples and cinnamon left us wanting dessert. We needed to work on salsa's and tomatoes in the afternoon and do our recap for the final test.

Apples Pies

The instructors planned a game, more of a trivia, about canning for the groups to participate in. The questions were things that we covered and it was a good way to break up the time in the kitchen. We all knew the test was looming and it was a good way to get a refresher of what we had been taught.

After the fun of the trivia game was over we had some additional education on the canning of tomatoes. We again scrambled to our kitchens to make the final recipe of our two days in class. Salsas! The groups did a variety from mango salsa, a basic Roma salsa, peach salsa, and our task, Tomatillo Salsa. It is known now in my household that I have had some rather not good luck with the green little suckers and the last batch of tomatillo salsa I made was not at its best. My best foot was forward to try to redeem myself and figure out what I could have done wrong. Each group was also able to choose the type of "heat" peppers it wanted to use for the salsa. We used poblano and jalapeno. Twenty minutes later and a final push to get everything canned and stations cleaned; I never got to try it. **This note is for Debby, Barbara, Sara, and Tery... please let me know how it turned out. I hope it was good.**

Before our final test the pies were cut and our little group raised our plates to our beautiful creation and our station went silent as we savored the perfect taste of our blueberry filling. The consistency was luscious, color was vibrant, and it was truly the best fruit filled pie that I had ever eaten. The filling wasn't overly sweet as some tend to be and it was a bonding moment for the five of us as we enjoyed our hard work.

Blueberry Pie Straight out of the Oven

Enjoying the Pie!

When the stations were cleaned, the food and jars packed away, and the class took their seats there was a low hum as we all took the final stage to becoming Master Canners. The test. But given all we had learned the test was a breeze. During the game earlier they had covered most of the questions and the rest were all things that over the last two days we had touched on or talked about while doing all those recipes. With the answers read and the work behind us we have become certified. The class of April 2011 has been given the status of Master Food Preservers.

As we left the building our work wasn't done and we all head our separate ways. During our drives home we reflect on so much that we have learned. How exciting it was to bring home a skill that has been passed down over the generations and somewhere along the way has found resurgence and need in our communities to have experts to rely on. We are a mix of generations in the class with many goals of how we will use this new found knowledge. But our one single goal will be "paying it forward" and continuing to educate future Master Food Preservers.

Solar Drying of Fruits and Vegetables

image found here

Here are two PDF files regarding Solar Drying.