Written by Bob Morris
I was out in the UNCE Orchard in North Las Vegas and we are starting to thin peaches. These thinned fruit, about the size of a garbanzo bean, can be pickled so dont throw them away! We are also ready to start harvesting green almonds. Green almonds are harvested when the hull is large but before the nut has had a chance to set up. The nut can vary from being semi gelatinous in the inside or firm and white but the outer part of the nut should be white and soft.
All almonds start off green.
Green almonds have a jelly-like, soft inside and a soft fuzz on the outside.
Green almond paste is used as a coloring paste on pastries in parts of Europe.
Green almonds are sometimes used in herbal glycerine soap for their Vitamin E.
Green almonds are available for an 8 week period in the early growing season from April to mid June. The developing almonds are considered ‘ripe’ for harvest as green almonds.
At this stage, the almonds resemble a tiny, immature version of their cousins the peach or apricot, with a soft green fuzzy hull surrounding the nascent nut.
Within the hull, the skinless, white “almond” characteristically has a gelatinous texture, similar to a firm grape.
Due to their short life span, green almonds have always been considered a rare delicacy.
Green almonds are popular in the Mediterranean and Middle East.
Green almonds are used by chefs as a cooking ingredient, but also as a garnish.
Green almonds have a distinct but subtle flavor that is hard to pin down, but has been variously described as delicate, grassy, fruity and even “green.”
Green almonds are often soaked in brine or milk to soften them for snacking. They can also be shaved or used whole in soups or salads to add their distinct flavor and texture.

Wednesday, March 30, 2011
Tuesday, March 29, 2011
Clear Jel vs. Ultra Jel by Jana Darrington
I had a questions regarding Ultra Jel vs. Clear Jel, and couldn't remember from class what was said! I called Jana and this is what she emailed me.
Here are some sources to buy Clear Jel online:
http://www.barryfarm.com/thickeners.htm
http://www.dehydratedfoodstorage.com/product/J141
http://waltonfeed.com/blog/show/article_id/416
On the Barry Farms site, when you scroll down the list of Thickeners they provide, you will see two listings for Clear Jel. One is Regular and the other is Instant (labeled as such). For something like pie fillings, you want to use the Regular Clear Jel. If you are doing fresh pies or want to thicken other items like gravies or such, the Instant version or something like the Ultra Gel (a form of instant) you are seeing in stores works great. However, Instant clear jels are not recommended for canning processes because they tend to break down (not gel sufficiently) during the long processing times.
Some of the other sites, they refer to the Regular Clear Jel also as (HOT) to differentiate it from a product like Ultra Gel, which doesn’t require heat in order to gel. If you can add the product to your fruit and it will gel immediate without adding heat, it is NOT Regular Clear Jel.
I hope that answers your questions! The Walton Feed place has a 25lb bucket (amounts to about $1.83 per pound, not including shipping) – if you can get some people to go in on the cost with you – split it up into 5 or 10 different portions. That will provide enough clear jel for your canning needs for several seasons.
Information from Jana Darrington
Utah State University Extension Assistant Professor
Family and Consumer Science Agent
Utah County Office
Monday, March 28, 2011
Dehydrate2Store

Sheila here from the class, I have been doing a lot of research on dehydration of food, as this is the process I think I am going to lean to as my primary preservation of food. Because of the time it takes to can and the space needed to store and the shelf life of can food dehydration works best for me and my family.
Tammy from Dehydrate2store has over 30 videos on how to dehydrate different fruits and vegetables, bread mixes and much more along with 30+ recipes on how to cook with dehydrated food. I found her videos to be the most informational. I also found her videos on how to package and store the dehydrated food the most helpful. I was not sure on how to dehydrated store food for long periods of time and she provides the information and videos on exactly how to package in the different types of containers from small bags to large bags to buckets and mason jars, and to have the confidence that your food would remain safe to eat in the future.
I hope you enjoy watching them as much as I have.
Sunday, March 27, 2011
Excalibur Food Dehydrator
Sheila here from the class, I have been doing a lot of research on dehydration of food, as this is the process I think I am going to lean to as my primary preservation of food. Because of the time it takes to can and the space needed to store and the shelf life of can food dehydration works best for me and my family.
I am going with a square style Excalibur 3900 from Excalibur. The reason I selected this dehydrator is; 9 drying trays, the trays are 15" x 15" providing 15' square feet of drying surface, the motor is attached to the back and not on the bottom so food can not drip into the motor area like the round dehydrators, I can leave a tray out above a tray if I have larger pieces with the round style you can not do that you have to stack the next tray, I also like the larger motor and automatic timer, and the 5-10 year warranty depending on the style. I have purchased two and can't wait to get started.
They also have a 5 and 4 tray style the price range is $120.00 to $250.00.
On the Excalibur website there are videos you can watch. (I recommend watching them) these videos are what helped me decide on the main method of food preservation. I have also purchased the food sealer, and Mylar bags for long term food storage.
Saturday, March 26, 2011
Clark County Fair & Rodeo Food Contest

The Clark County Fair & Rodeo in Logandale, Nevada will be having a contest in the Home Science Division which consists of home canned goods, as well as perishable foods. To see the entire list of products being accepted, click here.
- ALL NON-PERISHABLE FOODS (classes 33-34) must be received no later than 6:00 p.m. on Monday April 5th, at the Clark County Fairgrounds in Logandale, Nevada.
- PERISHABLE FOODS (classes 35-41) will be accepted Wednesday April 7th, from 11:00 a.m. to 4:00 p.m. and will be judged that evening at 5:00 p.m.
- All entries in canning jars shall consist of 2 jars, one to display and one for opening and judging.
- All perishable foods must be displayed on / in a disposable container, covered with clear plastic wrap, or may be displayed on / in container of your choice but container must be clearly marked with your name.
- All perishable foods will be judged on presentation.
Wednesday, March 23, 2011
Master Food Preserver Class - Day 3

On Day 3 we made pickles, pickled beans, pickled carrots and other fun pickled creations. We also made jams and jellies, at our pies from day one and took our final test.

Setting up for the perfect shot!


Spiced Tomato Jam with Powered Pectin
Since this was not in our handouts, here is the recipe for the yummy Spice Tomato Jam that group 6 made!
Spiced Tomato Jam
from University of Georgia
3 cups prepared tomatoes (prepare about 2¼ pounds tomatoes)
1½ teaspoons grated lemon rind
½ teaspoon ground allspice
½ teaspoon ground cinnamon
¼ teaspoon ground cloves
¼ cup lemon juice
4½ cups sugar
1 box powdered pectin
Yield: About 5 half-pint jars
To Prepare Tomatoes – Wash firm ripe tomatoes. Scald, peel, and chop tomatoes. Place chopped tomatoes in saucepan and heat slowly to simmering, stirring constantly to prevent sticking and burning. Cover and simmer 10 minutes, stirring occasionally. Measure 3 cups of the cooked tomatoes into a large saucepan. Add lemon rind, allspice, cinnamon and cloves.
To Make Jam - Sterilize canning jars. Add lemon juice to the prepared tomatoes in the saucepan. Measure sugar and set aside. Stir powdered pectin into prepared tomatoes. Bring to a boil over high heat, stirring constantly. At once, stir in sugar. Stir and bring to a full rolling boil that cannot be stirred down. Then boil hard for 1 minute, stirring constantly.
Remove from heat. Skim off foam. Pour hot jam into hot jars, leaving ¼ inch headspace. Wipe rims of jars with a dampened clean paper towel; adjust two-piece metal canning lids. Process in a Boiling Water Canner.
Recommended process time for Spiced Tomato Jam With Powdered Pectin in a boiling water canner.
Half Pint or Pint Pack Jar
0 - 1,000 ft - 5 minutes
1,001 - 6,000 ft - 10 minutes
Above 6,000 ft - 15 minutes
USU Food Preservation Fact Sheets

Tuesday, March 22, 2011
Master Food Preserver Class - Day 2

Salsa
For day 2, we canned salsas in the morning and then learned about pressure canning in the afternoon. We made soups, chili, meat, pork and chicken in the pressure canner!
From left to right
Hamburger, Chicken, Meat (Hot Pack), Meat (Cold Pack)

(these are the cans that Carolyn brought as a sample,
I didn't get a picture of ours, since there were not done cooking when we left.)
Monday, March 21, 2011
Utah State University - Home Drying of Food

Here are two great files from the Utah State University Cooperative Extension
- Home Drying of Food (PDF File)
- Home Drying Basics (Powerpoint File)
Master Food Preserver Class - Day 1

Carolyn and Jana
Carolyn (the Canning Guru) and Jana both came from Utah to teach a 3 day class in Food Preservation. Today's agenda was canning citrus, pie fillings and dehydrating.
A table full of canned goods!

Pears with a beautiful color!

Pie filling straight out of the wet bath!

Apple Pie filling

Fruits to dehydrate - kiwi, strawberries and oranges...
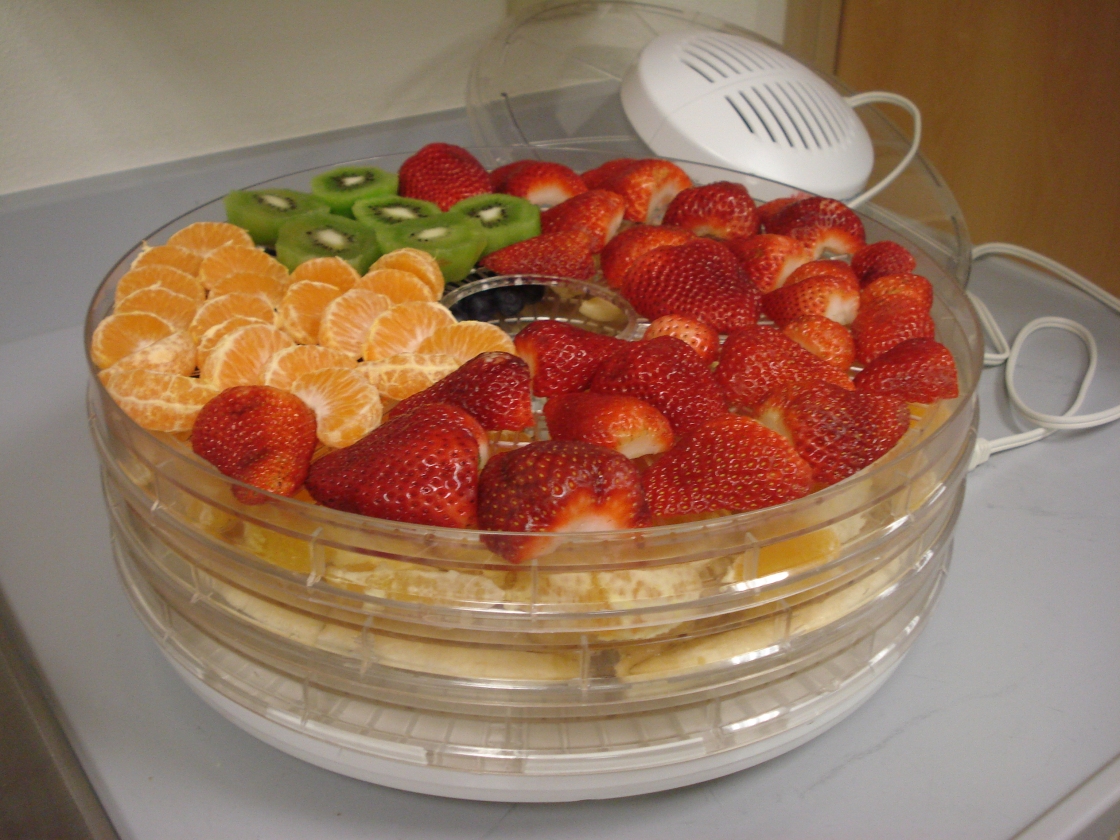
and a tray of veggies and more fruit!

Welcome!!
I'll be working on making our blog "pretty" over the next week or so. Keep checking back for updates and new pictures. Right now I'm just enjoying the Master Food Preservers class!
Subscribe to:
Posts (Atom)